Here is the continuation of the actual route we followed on our trek across Edziza. As you review the route and notes, keep in mind that we started from camp 4 on day 6 (being a full day behind at that point). We also covered both the day 7 and day 8 sections of the route all on what was for us day 8 - the final day of our hike.
The route for each day starts with an overview of the route, an elevation map, and a Google Earth overview screen shot, followed by several more zoomed in views. I have tried to provide notes after each section where needed. Even though we were off schedule on our actual hike, I have broken things up here as though we were on schedule. Click on the pictures if you want to get a larger view.
Day 5
Camp 4 to Camp 5
Total Distance: 14.8 km
Elevations: Min = 1652 m, Avg. = 1862 m, Max. = 1999 m
Elevation Changes: +710 m, -710 m
Total Distance: 14.8 km
Elevations: Min = 1652 m, Avg. = 1862 m, Max. = 1999 m
Elevation Changes: +710 m, -710 m

Day 5 starts from camp 4 at the headwaters of the north fork of Walkout Creek, climbs up onto Big Raven Plateau, and winds through the south west volcanic complex to camp 5 at the headwaters of Sezill Creek.

I can't tell you what it is like to actually camp at camp 4 because we didn't actually stay there. From what we saw on the way past, it looked like there were several good spots to camp near the creek and the views up and down the valley were quite spectacular.
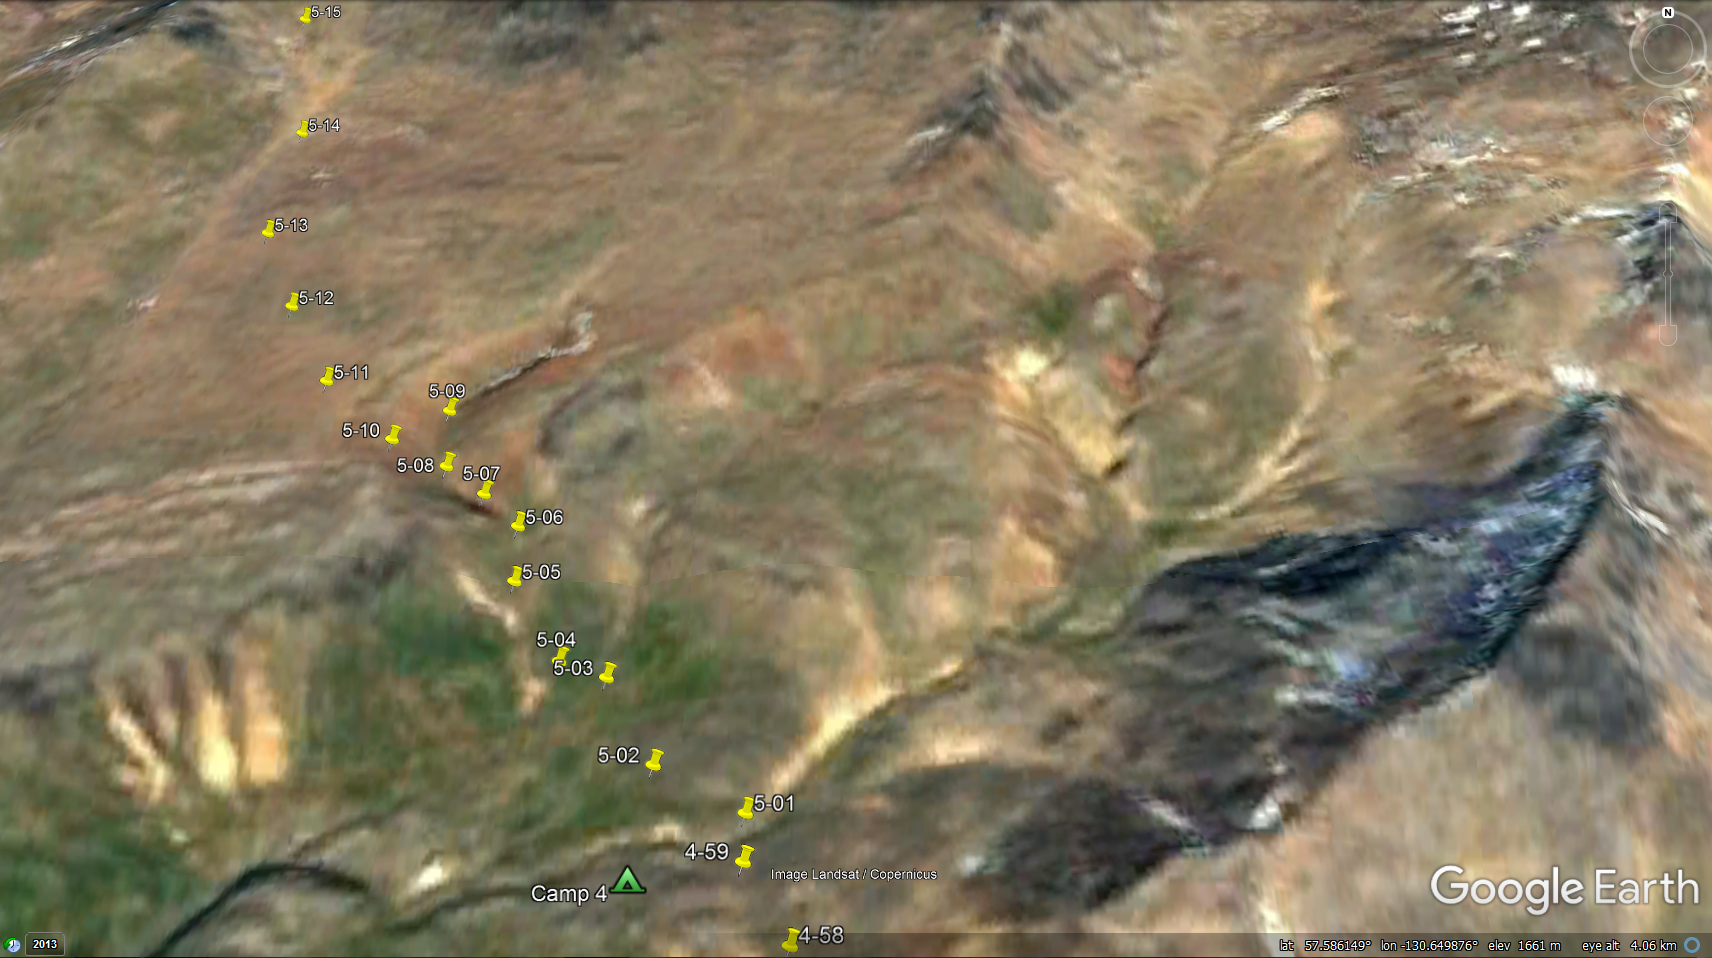
The outfitters trail that we picked up yesterday in the pass leading to Chakima Creek continues from the vicinity of camp 4 up a narrow gully leading onto Big Raven Plateau. The trail follows up the right hand side of the gully and then switch backs up the opposite side about two thirds of the way up (at 5-09). Once you reach the top of the gully, the trail fades away.

Once we hit the top of the gully we aimed for a low saddle on the ridge directly in front of us (5-16), see photo in the trip report). It was a gradual climb to the top. Another option would have been to skirt to the west of the ridge and pass between the ridge and Keda Cone. But I would favor our route over the ridge as the panoramic view of the volcanic complex from the top was quite spectacular.
From the top of the ridge we descended in a north easterly direction and followed Taweh Creek upstream until we spotted some cairns indicating the safest place to cross the lava flows (5-21). Note that the creek is the last water source for the next 10 km so make sure you fill up here. The cairns do not form a continuous chain of markers through the volcanic complex but a faint trail (really just a worn path in the loose rock and ash) develops here which becomes more well worn as you proceed.

By the time you round the unnamed volcanic cone on the other side of the lava flow (5-25) the trail is quite distinct and easy to follow. The trail heads north and hooks around the east and north sides of Coffee Crater as it crosses the dry lake bed (5-35 and 5-36) and ascends through a low gap between the crater and a ridge to the north (5-37). The trail in this section is mostly on a mix of pumice, fine-grained obsidian, and volcanic ash - very abrasive on the boots.

Once you pass Coffee Crater you enter a section dominated by gray sand-like volcanic ash. The trail continues to be easy to follow as it heads north west over and around piles of ash.
As you approach Cocoa Crater (passing to the east of it) you will be heading up a drainage that drains off the west side of Tencho Glacier. Here (points 5-47 to 5-52) you need to use caution and choose your route carefully - part of the glacier is overlaid with ash and it is hard to tell if you are on terra-firma or on the glacier. There were several exposed crevasses with steep loose material surrounding them. The trail ended up crossing over a hanging ice bridge - we didn't realize it till after we crossed. Watch where the worn path is heading and be prepared to alter your course as needed.

Once you reach the top of the drainage (5-54, north east of Cocoa Crater) the trail heads north west and then west to round the nose of Koosick Bluff. As you pass to the west of the bluff, the trail fades away and views of the headwaters of Sezill Creek open up. Here you are up on a rise overlooking the upper valley (5-51). Camp 5 for the night is anywhere along the creek.
Day 6:
Camp 5 to Camp 6
Total Distance: 14.6 km
Elevations: Min = 1660 m, Avg. = 1773 m, Max. = 1835 m
Elevation Changes: +569 m, -549 m

Day 6 takes you from camp 5 at the head of Sezill Creek, along the west face of Mount Edziza, and through a low pass east of Tsekone Ridge to Camp 6 south of Eve Cone.


From camp 5 start by angling higher up the drainage of Sezill Creek to avoid crossing some of the deeper valleys. When you can see the nose of Ornostay Bluff, skirt around the nose to the west.

Navigation on the plateau is about as straight forward as it can get - just wander north anywhere on the plateau you care to go. We tended to stay close to the glacial moraine fronting Edziza. Any creek crossings on this stretch were a simple step across or rock-hop.


Just before Tsekone Ridge there is a nice waterfall on one of the larger creeks (east of 5-42). At this point, if you are close to the falls, ascend to the low pass between Edziza and Tsekone Ridge (6-46).
Another option, if you are farther out on the plateau, is to skirt around the west side of the Tsekone Ridge and camp near the headwaters of Elwyn Creek and overlooking the valley bellow. This was our original plan but we opted to cut the corner instead to save some time.


From the low pass, bear slightly east of north towards Eve Cone (you can't miss it). Camp 6 is near where two glacial creeks, that drain off the north face of Edziza, come together (6-54). These were boots-off crossings for me but Christoph, with his long legs, found spots where he could rock-hop.
We opted to camp up on the plateau just north of where the creeks joined to avoid any surprises from the grizzly bear that was wandering the area. The added bonus is that the views from camp were spectacular in all directions. If you need to avoid any winds, camping down by the creek is an option.
Both creeks were quite murky but we found a small side channel that ran underground for a bit before bubbling back to the surface. Being mostly filtered through the sand, it was an acceptable place to filter drinking water.
Day 7:
Camp 6 to Camp 7 (with climb up Eve Cone)
Total Distance: 14.1 km
Elevations: Min = 1304 m, Avg. = 1516 m, Max. = 1735 m
Elevation Changes: +186 m, -562 m

Day 7 goes from camp 6 to Eve cone, then follows the trail that develops near Eve Cone to Willie William's (outfitters) camp just below tree-line.

It is possible to push all the way to Buckley Lake from camp 6 in one long day (~22 km, including the side trip up Eve Cone). This is what we ended up doing to avoid a nasty shift in the weather. Had we not done this, it would have been an easy 2 days to Buckley Lake with lots of time to linger at Eve Cone and an early afternoon pickup at Buckley.
Note that the exact locations of Oasis camp and the outfitter's camp on the map may not be accurate. I had planned to re-position those waypoints when we passed by the camps, but I neglected to do so.

From camp 6 head straight for Eve Cone. If you plan to climb the cone, skirt around the base to the north side and follow the worn path to the top (to avoid creating any new scars on the slopes).

Right at Eve Cone, a trail materializes along the edge of the lava flows (7-09). It essentially follows the edge of the lava flows around the east side of Sidas Cone

As I mentioned, I am not sure the Oasis camp location is accurate on my map. When following the trail you eventually come over a rise and drop into a small gully where a stream bubbles out of the ground. Oasis is often used as a camp location for people making the hike from Buckley Lake. Tenting spots are a little tight here but the water source and distance from Buckley Lake makes it an attractive stopping point when hiking the reverse direction.

There are two outfitters camps to choose from for camp 7, one near treeline and one a little below treeline - not sure which one was Willie William's camp. Both are right on the trail so you can't miss them. Water sources are nearby but they are a little swampy with lots of horse dung around them. Both camps are well used but offer the possibility of a camp fire.
Day 8:
Camp 7 to Buckley Lake
Total Distance: 7.54 km
Elevations: Min = 829 m, Avg. = 1043 m, Max. = 1304 m
Elevation Changes: +32 m, -499 m

Day 8 simply follows the forested outfitters trail all the way to Buckley Lake. The trail is in decent shape if not a little rough and wet in places. It's down hill all the way so not too strenuous of a hike.

As you near the lake, there is a short boardwalk section that crosses a swampy area. Some of the boards are rotten or missing but the swampy section was dry when we were there so it wasn't a problem. A log bridge crosses Buckley Creek about 1 km from the Buckley Lake camp.
Buckley lake camp is well used and I found it quite messy. We didn't need to spend the night there but there are plenty of places to pitch a tent. There is also a bear proof food locker near the east end of the camp and a couple of fire pits.
No comments:
Post a Comment
Note: Only a member of this blog may post a comment.